Like most people, when you see an item of clothing you like in a store, online, or in a magazine, you look to see if they have it in a different color. Maybe it’s the cute little red dress that you’d rather have in black or it’s the last t-shirt in your size that looks amazing on you, but all they have is plain, old white when all you really want is a shirt in the Pantone color of the year, Honeysuckle!
If either of these scenarios have ever happened to you, then you are a person who does not know how to dye fabric.
I can understand why dying fabric or yarn can be scary for people. Dying fabric is like baking—an exact science that doesn’t lend well to experimentation if you don’t know the basics. What many people don’t know, though, is that, unlike baking, dying is also as easy as boiling water for a cup of noodles. All it takes is the ability to precisely follow the directions on the package.
To show you, my dedicated super crafters, how easy dying can be I took pictures of the dying process for a personal knitting project, a sweater from the book Big Girl Knits by Jillian Moreno and Amy R. Singer.
Here’s a little background: I found an absolutely adorable pencil skirt in Lane Bryant, but the tops that matched it were all quite expensive. Being on a budget, I decided to make my own top to match it. So it was off to my yarn stash to find the yarn! Unfortunately, the pattern calls for a fingering weight yarn and I mainly knit in DK or worsted weights. (Basically, for all you non-knitters, the pattern yarn would be a size 2, but the yarn in my stash are mostly 8s, 10s, and 12s.) What could a Super Crafter, then, but jump on the internet and start Googling yarns?
The pattern size that I am making calls for nearly 500 grams of yarn, so I knew that I would be getting a heck of a lot of yarn and budget was still a very real issue. While there are many beautiful yarns out there in the colors that I wanted, the yarn that met the bulk and budget mandates was Lion Brand LB 1878. The only problem? It didn’t come in the color I wanted—deep pumpkin orange. The solution? That’s right, dye it!
Here are some of the benefits for choosing to dye this yarn:
- LB 1878 is 100% wool, so the color will be more true than if I were dying a blended fabric like cotton/acrylic.
- By dying the yarn I have more control over the final color outcome.
Now here are the downsides:
- Dying anything is messy, so be careful. Keep paper towels and, most importantly, bleach in easy reaching distance to clean messes.
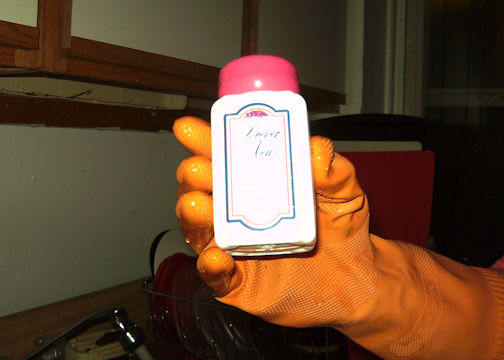
- Dying is toxic. Unless you’re using Kool-Aid or soy-based dyes, the dye you work with will be dangerous in some way. Be careful not to get it in your mouth (wear a dust mask to keep out powder in the air) or on your skin (I don’t care what the designers on ‘Project Runway’ do, wear rubber gloves!) Last, but not least, do not mix or heat the dye mixture in anything that will be used for food (buy a separate stock pot, measuring spoons, and wooden spoons.)
- Dying is not fool proof. No matter how well you prep the fabric and follow the directions, something might go wrong. Try to think of these moments as “happy accidents” and see how you can work with them.
Okay. Saying all of that, here is the step-by-step:
 |
Step 1: Choose your color. I visited the Rit website to find a color and I chose Orange #98.
To achieve the color, I mix one part Sunshine Orange with one part Tangerine.
Since I had so much yarn, I used a whole package of each. |
 |
| Some of my basic dying tools: a pair of thick rubber gloves, a long wooden spoon, and a thermometer (I used what I had, which was a meat thermometer.) |
 |
| While you are preparing the dye mixture, prep the material that is going to be dyed by soaking it in hot tap water. Squeeze the material to make sure that the water penetrates all of the fibers. |
 |
Get a large—very large—the bigger, the better—stock pot. It doesn't need to be top of the line, either. I found this pot at my local dollar store. It holds about three gallons of water.
Fill the stock pot with the recommended amount of water. As it turned out, for the amount of yarn I was dying, three gallons of water is exactly what was needed. Once the pot is filled, start boiling the water. |
 |
Here's where the thermometer comes into use. Use it to check the temperature of the water while it boils. You'll want the temperature to be around 140 degrees; anything hotter may damage the material you're dying.
Once the desired temperature is achieved, reduce the burner so the water maintains a simmer. |
 |
| While your water is heating up, you'll want to mix your colors. Pour your packages of dye into a container that—IMPORTANT!—is not going to be used for food after you mix the dye. |
 |
| Add about two cups of really hot tap water. If your tap water doesn't get very hot on its own, heat up the water in the microwave. The hotter the water, the easier to dissolve the powder. SUPER CRAFTER HINT: If there is one point of this process where you wear the face mask, this is that point. Trust me, there is nothing grosser than tasting toxic powder floating in the air. |
 |
| Stir your dye mixture until the powder is completely dissolved. |
 |
| When the powder is dissolved and your water is simmering at the correct temperature, pour the dye concentrate into the boiling water. |
 |
| Stir the pot ;) |
 |
| It is completely normal if you get a weird pastel foam on the surface. |
 |
| Remove the material from the soaking bucket... |
 |
| ...squeeze out the excess water... |
 |
| ...and keep squeezing... |
 |
| ...and squeezing (my roommate got a little camera happy, but she got some great shots so it's totally coolsville.) |
 |
| Carefully lower the material into the dye vat. |
 |
| And keep an eye on the water level. Seconds after N took this photo, the dye mixture spilled over the side of the pot and I had to do some emergency stove cleaning. Thankfully, I had an old rag towel on hand and my bottle of Clorox spray cleaner nearby. |
 |
| The fabric will want to float at first... |
 |
| ...so use your trusty long, wooden spoon to stir the material and press it down gently into the pot. |
 |
Continue to press, turn, and stir the material in the pot. To help the color set better, add one cup of white vinegar to dye vat five minutes after the material has been added.
Continue to stir the vat for the next 30-60 minutes. |
 |
| Every once and a while, use your spoon to lift the material to check the color. SUPER CRAFTER FACTOID: Color—whether it's a piece of fabric or a freshly painted wall—will look darker when wet. Even with my old, sub-par camera, this color looks more like Ronald McDonald hair than a fresh, Fall pumpkin. I am not worried, though, because I know that the color will change once the yarn dries. |
 |
| After the material has soaked in the vat for an hour or more, take the pot to the sink and pour out as much excess mixture as possible while keeping the material in the pot. |
 |
| Begin rinsing out the material, starting with hot tap water and gradually adding cold water until it's just cold water. |
 |
| Agitate the material to remove the excess dye, then pour the water out. |
 |
| Continue to add water, agitate the material, and pour out the water. |
 |
| When it looks like all of the dye is out of the material squeeze out the excess water. |
 |
| I like to run the material under the tap a little more to just make sure it's out. |
 |
| Put some mild detergent into the pot. |
 |
| I used a mild lingerie detergent. |
 |
| Then add more water and agitate the material all over again. |
 |
| You'll notice as you wash the material that the water will suddenly dark again. And then you'll think, "What the?!" But it's ok. Really it is. It's just the dye that was hiding in the fibers getting flushed out. |
 |
| Now you go through the rinse cycle again. |
 |
| Look at how much dye was left in there! |
 |
| Squeeze out all the excess water. Squeeze it reeeeeeeeal hard! |
 |
| Then hang the material over the sink to let it drip more of the water out over night. |
 |
Because I dyed so much yarn it needed a lot of drying time. I had to set it in front of the air conditioner and turn it and hang it, turn it and hang it.
When it finally dried, as expected, the color turned a luscious pumpkin orange. |
Keep in mind, Super Crafters, that this is just one dying technique; there are lots of others out there. In my yarn dying research I found a great how-to on using Kool-Aid to dye yarn on
Knitty.com. The Rit website also has some great how-to's on different
dying techniques like tie-dying, spot dying, and (
the hot color technique of the season) ombre.
Go forth! Color your world in every way!


No comments:
Post a Comment